Right after a successful spring cleaning, you might be needing a brand-new garden bench. It is possible to achieve this task on your own, all you need is the right materials and some time for the job. Go ahead and pick out that dream spot in your front or backyard and let it be your goal for the finish line.
Design details
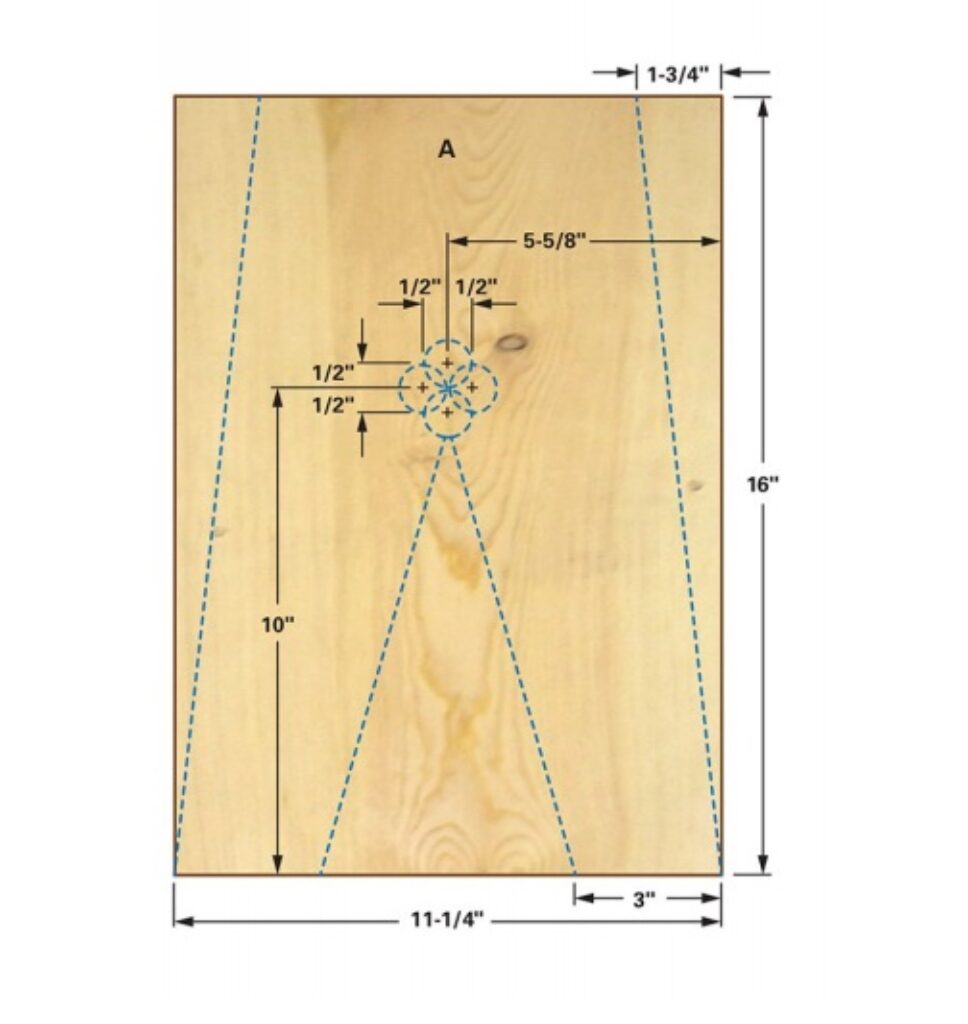
We hope to build a garden bench to reanimate an originally simple design made with just a bunch of pine boards simply nailed together with an inventive design feature of a cloverleaf form made on the side with drill holes overlapping each other. That is a perfect garden bench, and we are going to modernize the design for our purpose. The general details are pretty much the same, but ours will be a bit stronger and longer than the original design. The choice of lumber makes it very cost-effective too.
We want to make a garden bench that is super easy and can very well be put together by hand tools, but we are using power tools for added speed. Using a miter saw, we cut out the stretchers to the desired length and made 10˚ angle cuts on both sides of the middle stretcher. All the other cuts were done by a circular saw. A jigsaw or circular saw can be utilized for all the cuts in the absence of a miter saw.
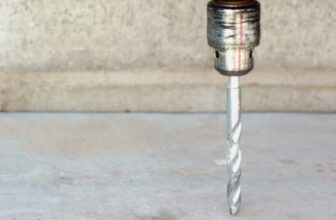
To recreate the cloverleaf shape with holes, we used a 1-inch hole saw stationed inside a cordless drill. A corded drill will work just the same for this.
We chose a knotty number 2 pine wood for this how-to-build garden bench project. Straight and flat boards with knots that are not loose but solid should be chosen for this project. With 2-inch countersunk screws, we put the bench together and used the wood filler to cover up the holes. If you will be using this bench outdoors, make use of crews that are resistant to corrosion.
Build the bench
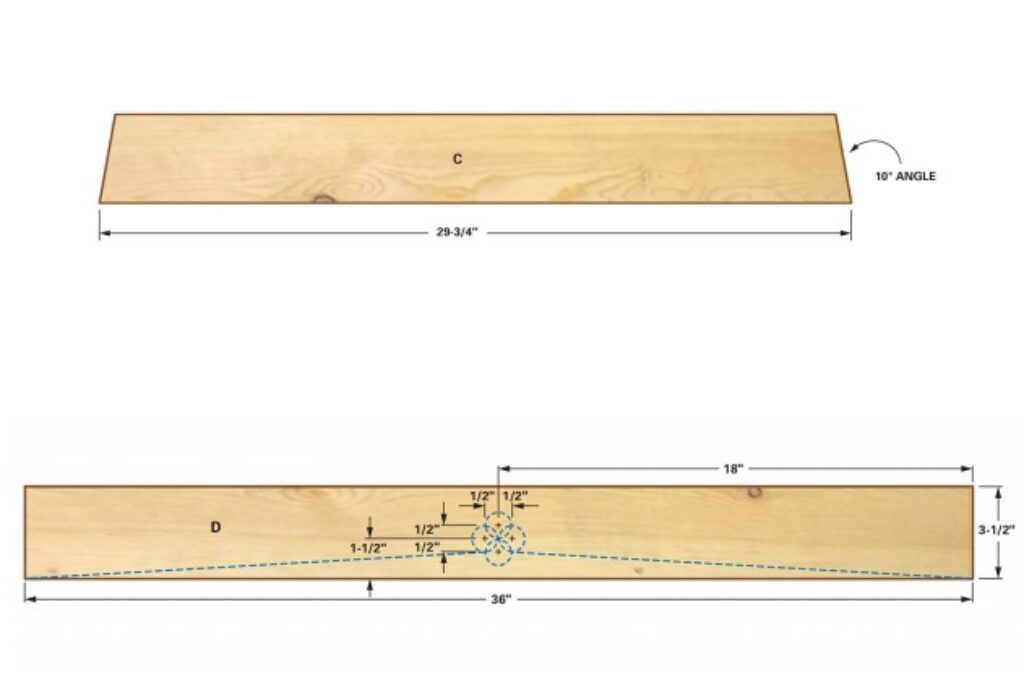
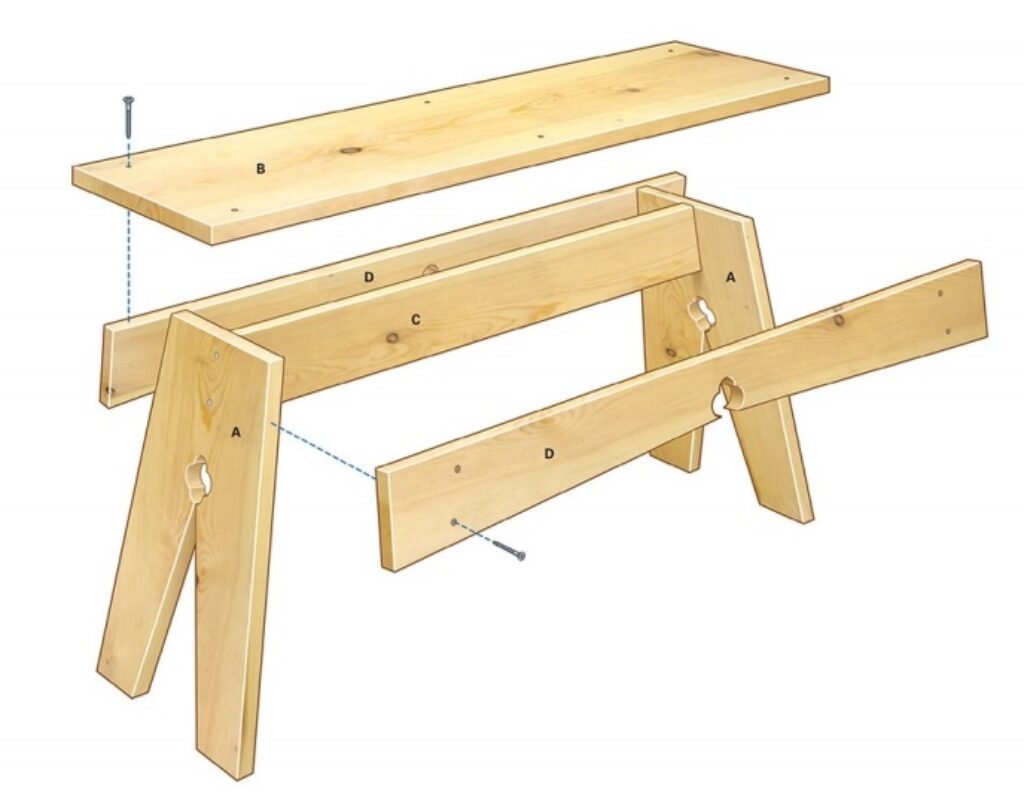
Cutting the wood is the first step before we build a garden bench. Cut the legs from the 1×12 pine and add a 10˚ bevel at the bottom keeping them angled in one direction. Cut the stretcher to the desired length with the 10˚ angle on either side and cut the aprons too.
Mark the aprons and ins for cutting and drilling. At the right intersections, make starting holes using a punch or nails for the hole saw.
Drill the 1-inch holes halfway through the boards and sand the holes. All the parts with sharp edges and rough saw cuts will be sanded as well. If you want some paint, it is a good idea to do that before completing your how-to-build garden bench project.
Mark the position of the legs and stretcher then order the legs with the bevels facing the right orientation. Screw through the legs into the stretcher and screw two aprons onto the legs too.
After marking the position of the aprons under the bench, screw the top to the aprons. With the bench standing upright, align the top with the aprons and use six trim screws to fasten the top.
Tools & materials required
For this how-to-make garden bench project, you will want to prepare your tools and materials ahead of time. This will save you time, frustration during the project, and annoying last-minute trips to the hardware store. Here are the materials you should prepare:
- 2-inch trim screws.
- 1×4 number 2 pine wood.
- 1×12 number 2 pine wood.
- Cordless drill.
- Miter saw.
- Circular saw.
- Countersink drill bit.
- Tape measure.
- Safety glasses.
- Speed square.
- Hole saw kit.
- Straightedge.