Nooks and crannies are typically overlooked areas in the average house but these spaces can be very useful. It is 100% possible to make those idle spaces useful. Not only that, combining some great decoration ideas when you build a floating desk turns your space into a stylish corner. The typical procedure to make a floating desk is fastening a wood surface onto a plywood foundation. All of it should rest on an E-frame that holds it up and trim is added to the front for a nice finish.
Tools & materials required
The first thing about how to build a floating desk is the tools and materials you will need to complete the job. Make sure that you have all of them ready before you start so there is no need to run off to a hardware store mid-job to get something you forgot. With these measurements, gather the tools and materials below:
The procedure for construction
Everything about how to make a floating desk is quite simple. First of all, you need to determine which particular location the shelf will go. You will then mark the best placement for the floating table with a spirit level. Preparations have to be made in your selected and marked-out area before anything else goes on. Glue, screws, and nails are used to construct the desktop and then the hanging process is next. Another key point is to make the floating desk as strong as possible so it lasts longer.
Now here is a step-by-step guide to follow so you don’t miss or mix up any of the steps when you build a floating desk.
Step 1
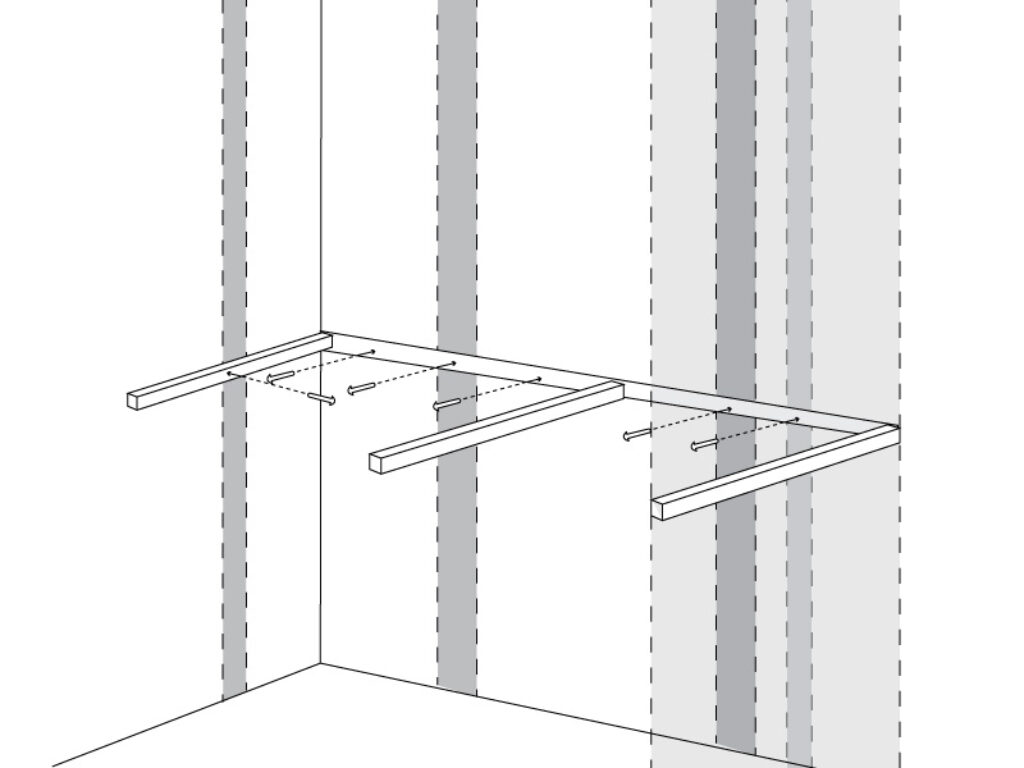
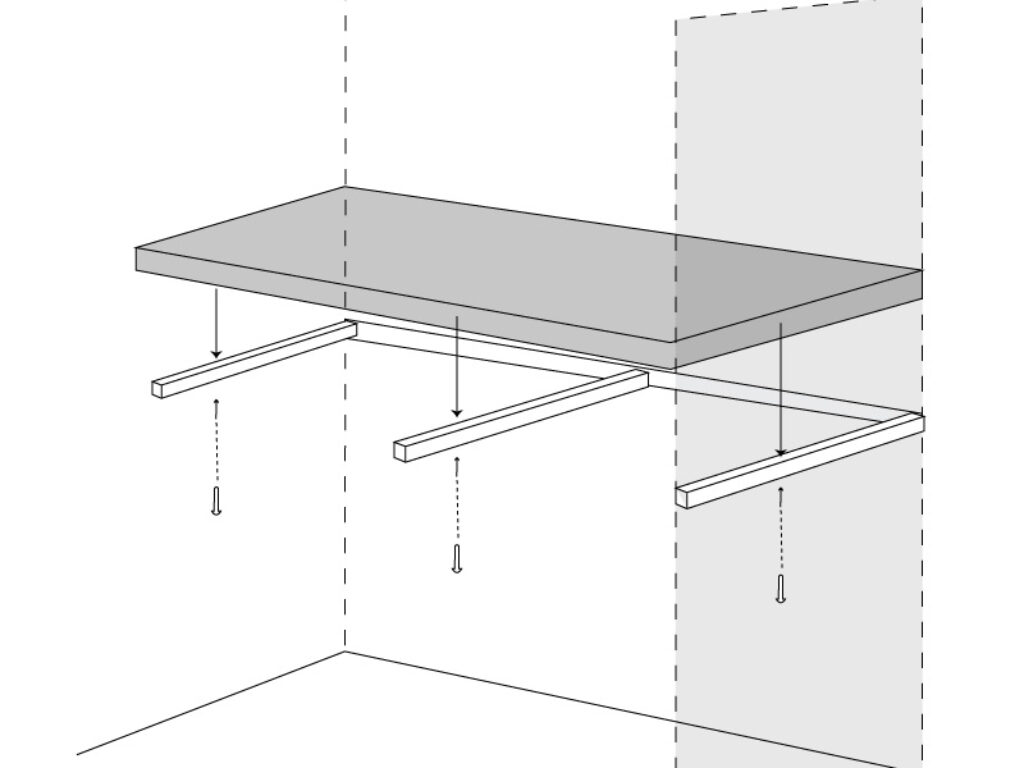
Put the E-frame together. Now the E-frame literally looks like an ‘E’ as the name implies. There is one base piece and three lumber arms assembled together to form the complete frame. You will screw each of the lumber arms onto the base piece, one arm on each end and the third in the middle. Glue it together with the dura bond for extra security.
Step 2
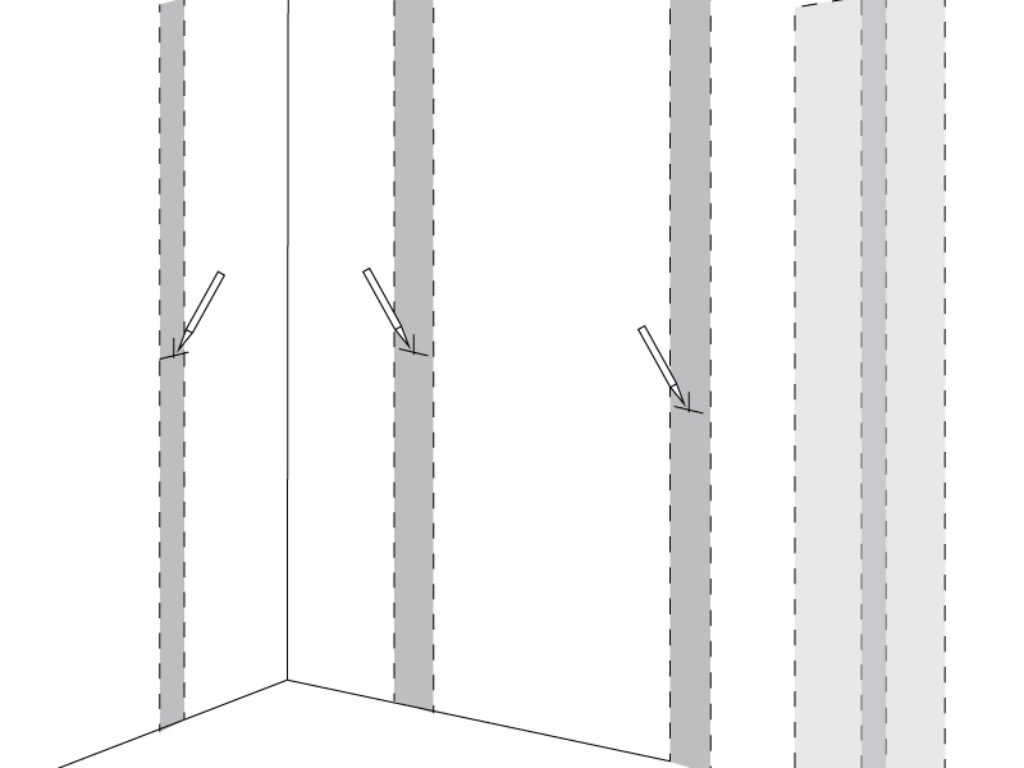
Mark out the desk area. You need to find two areas where the desk can be supported when it is mounted, one at the back and one in front. You can find these with a stud finder and mark them off with a pencil and a spirit level.
Step 3
Fasten your support. Using 65mm screws, attach the E-frame to the stud marks against the wall. Evenly fasten more screws along the frame on the wall.
Step 4
Put the surface together. The next step for how to build a floating desk is preparing the surface. Add surface panels on a plywood base and glue them together when you find the perfect fit. Fasten the back of the plywood with 12mm screws then sand down the edges and surface.
Step 5
Install your floating desk. Secure the surface on the E-frame with nails then use liquid nails to add the trim pieces in front.