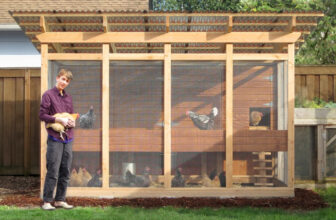
If you’re looking for a way to improve the security and appearance of your home, adding a wooden gate is a great option. Not only will it keep unwanted guests out, but it can also add some much-needed curb appeal. In this blog post, we will walk you through the steps of building your own wooden gate.
Choose the right type of wood
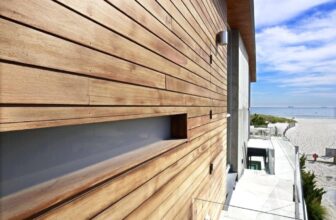
This is an important step, as different types of wood have different levels of durability and resistance to wear and tear. Cedar, redwood, and pressure-treated pine are all good choices for exterior applications.
Design the gate with a pencil on paper or using a computer program such as SketchUp or AutoCAD. Consider what kind of hinge setup you will be using (self-closing hinges are best for gates) and whether or not you need to use additional support braces. Make sure the gate is wide enough to accommodate any vehicle that needs to pass through it.
Cut the wood to size
Cut the wood according to your design specs with either a jigsaw or circular saw – whichever works best for you. Be careful while cutting; you want to make sure the pieces fit together cleanly and evenly.
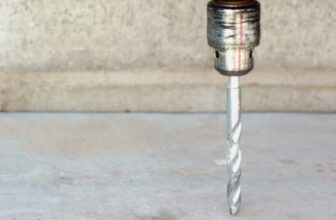
Drill pilot holes for your screws, bolts, or nails. This will allow you to secure each piece of wood without splitting it. You can also use clamps to hold the gate together while drilling.
Assemble the frame
Assemble the gate using your chosen hardware (screws, bolts, etc.) and apply a coat of waterproof sealant to minimize weather damage. If you plan on painting or staining the gate afterward, wait until after it is assembled before doing so.
Install the gate
Install hinges onto the posts and hang the gate onto them. Make sure the hinges are tight and securely attached; otherwise, they could break away from the weight of the gate over time.
Before installing the gate, it is important to make sure that the posts are sturdy and securely set in place. They should be firmly embedded into concrete footings for additional support. If necessary, use metal post anchors to secure the posts. It is good practice to add extra length to the post so that the gate frame will hang off of them slightly in order to prevent sagging or warping over time due to temperature changes.
For additional strength and stability, consider adding cross-bracing on the back of your gate frame. This can be done by adding a diagonal support piece between two opposite posts using galvanized screws and washers. The added bracing will help support your gate against swings or changes in wind direction.
If you plan on attaching locks to your gate frame, make sure they are securely fastened with bolts or screws that are long enough not to pull through the wood over time. Additionally, if you want a self-closing latch on your gate, be sure to use heavy-duty hinges as lighter-duty ones may not hold up well under sustained use. You may also choose to install an automated electric opener for added convenience and security.
Finally, once all of the hardware is installed and secured, it’s time for some finishing touches! Paint or stain your wooden gate in a color that complements your home’s exterior or gives it a unique look all its own. If you’re looking for an authentic look, consider using a natural oil-based finish as well – this will allow the wood grain texture to come through while also protecting against moisture damage and UV exposure over time.
Stain or paint the gate
Before you apply the stain or paint, use sandpaper to lightly smooth out any rough edges and surfaces. Clean off any sawdust with a lint-free cloth. When applying the stain or paint, always work in a well-ventilated area with protective clothing and eyewear, as this will protect you from fumes. Apply multiple layers on each side of the gate for protection against weathering. Allow it to dry fully between coats before continuing application. Finally, finish off by adding any decorative features like door knobs or hinges if desired. With these steps, your wooden gate should be ready for installation!
Installing a wooden gate is a great way to improve the security and privacy of your home while also adding some extra curb appeal. Our step-by-step guide provides all of the information you need to build your own gate, no matter what your level of experience may be. We recommend using pressure-treated lumber for outdoor projects like this to help prolong the life of the wood and protect it from weather damage. If you have any questions or run into any problems along the way, feel free to reach out to us for assistance!
- Drill/driver.
- Jigsaw.
- Circular saw.
- Deck screws extreme heat.
- All weather adhesive glue.
- 3 heavy-duty gate hinges.
- 1 x 4 x 30inch wood board.
- 4 x 4 post concrete mix.
- 4 x 6 PT deck boards.
- 1 x 4 x 72inch wood board.
- 1 x 8 x 39inch wood board.