In relatively every room of your home, you can discover huge amounts of storage space covered up between the wall. Basic stud-space shelves are incredible for catching a portion of this squandered space. You can make easy-to-use proper methodologies to construct them. You can easily afford all type of material to build shelves.
Numerous homeowners pick to fabricate kitchen shelves as a component of their remodels keeping in mind the end goal to accomplish a traditional look without an enormous price. Indeed, even without a noteworthy renovation, including new shelves can change your kitchen look. Think about blending and coordinating different styles of shelves and distinctive finishing touches to make your ideal kitchen.
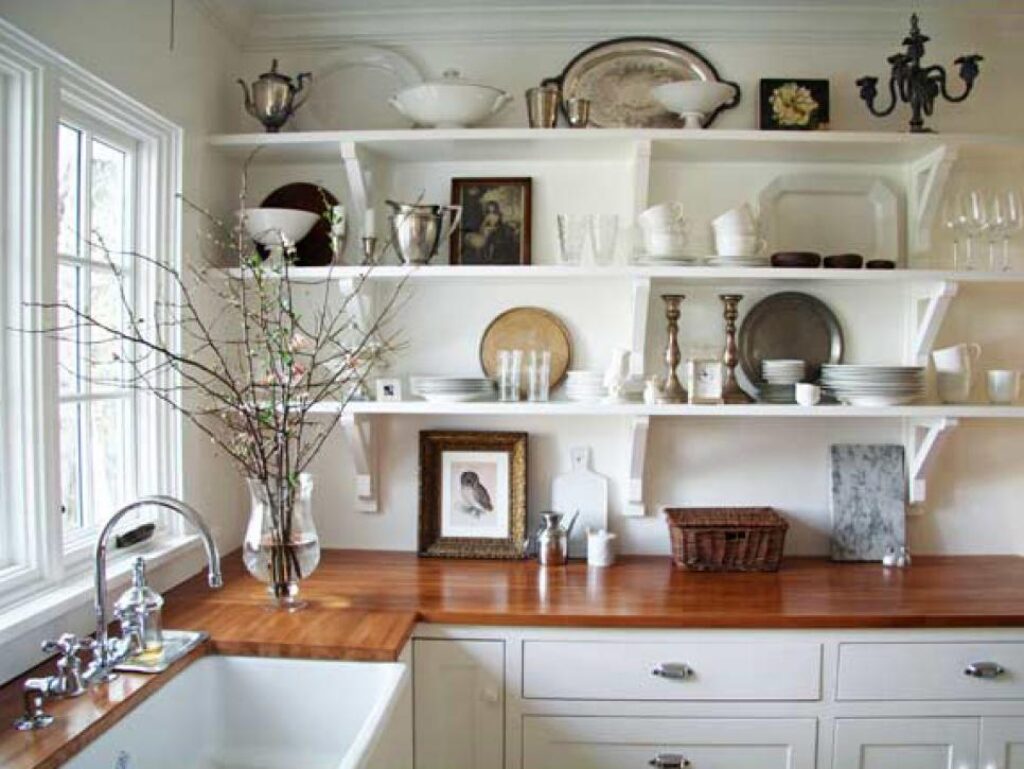
Confirm, you’ve decided that you need to modernize your kitchen shelves. Be that as it may, your shelves are fit as a fiddle and give enough storage. Then what to do? Indeed, clearly, you have choices. Fundamentally, you have many options to enhance your cupboards:
- You can purchase new shelves.
- You can renovate your shelves.
- You can add another sophisticated look to your current shelves to use new and updated material.
Replacing and purchasing new shelves are a costly and frequently extensive process. Since you are accepting your shelves are fit as a fiddle and work for your requirements, you’re going to focus on low-cost approaches to enhance the look of your shelves. In addition, one major advantage of building kitchen shelving is the shelves are appropriate for you what you want to need.
A large number of the accompanying methods should be possible by the do-it-yourselfer and it is a benefit for you.
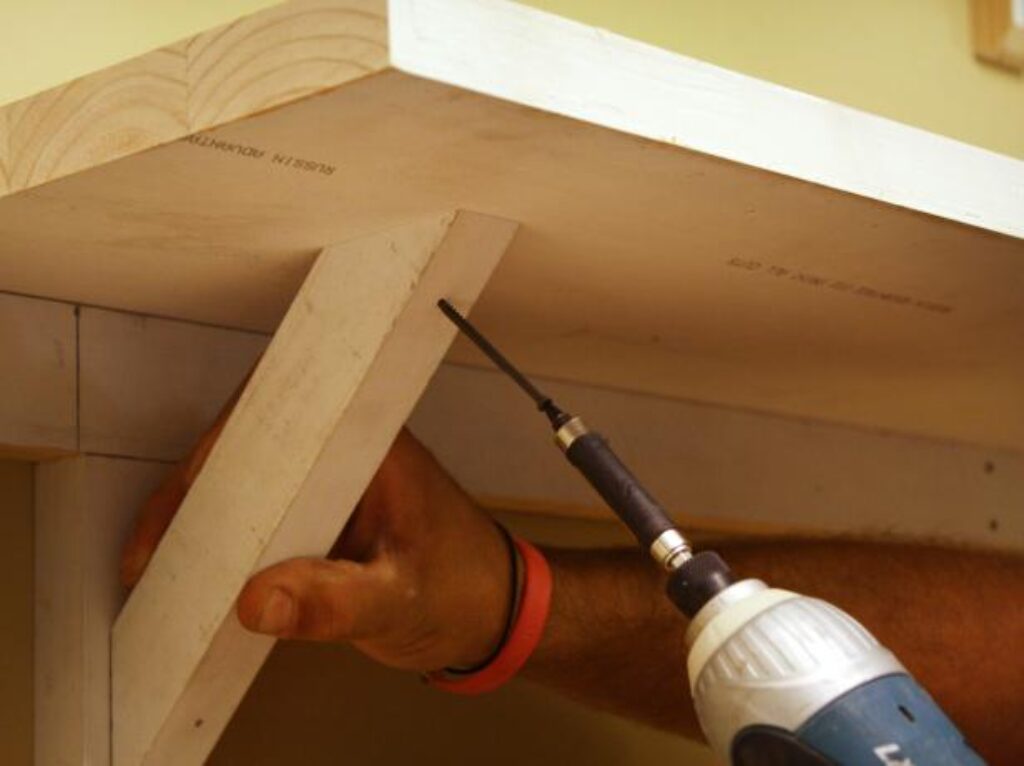
Step 1
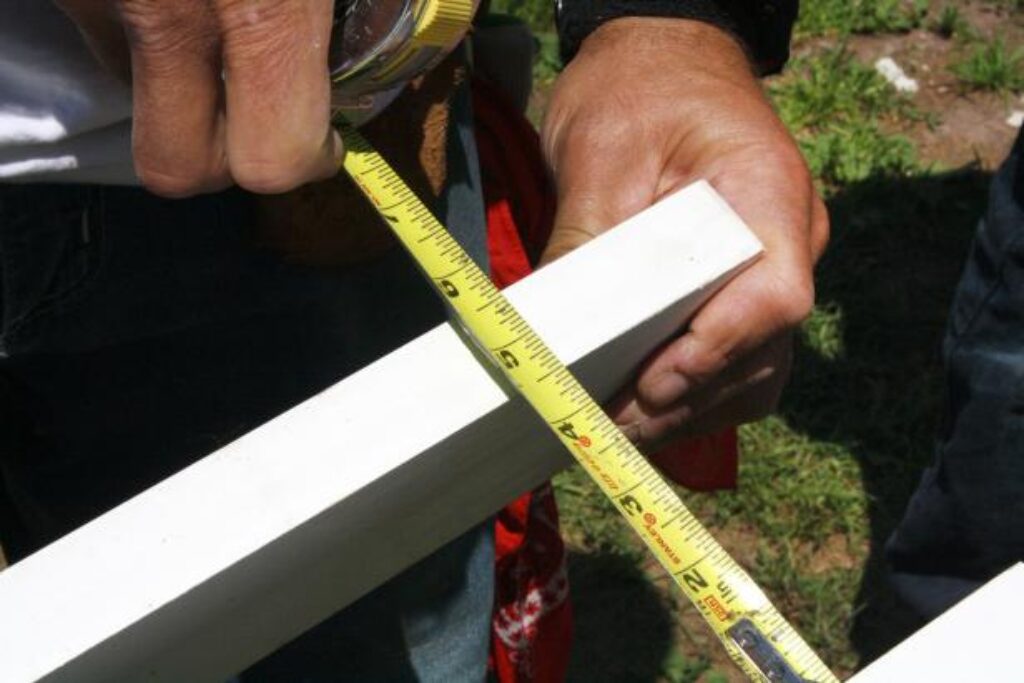
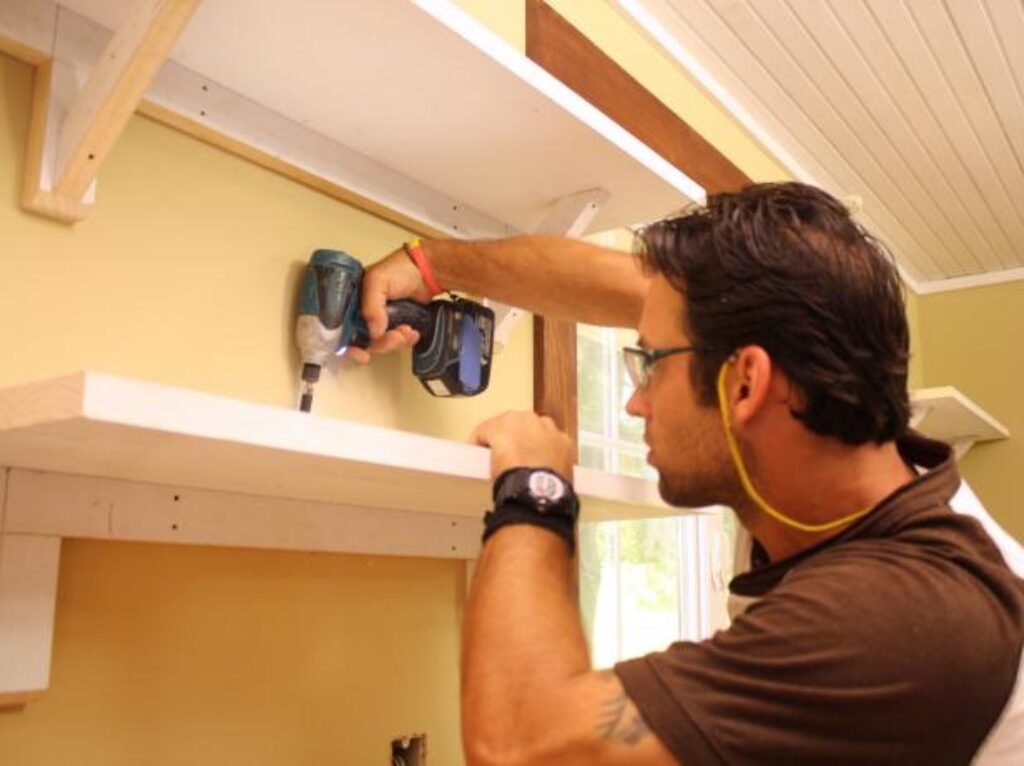
You need to make a box with good quality planks of choosing pine wood together required with 2-1/4-inch nails.
Step 2
Pin the racking into the box, dividing the last three shelves sufficiently far separated to fit bushels with a 1×8 board beneath them.
Step 3
To fit the back of the shelving unit you need to cut a bit of shallow plywood. Utilize development glue to secure it to the back of the racking unit and nail it into put.
Step 4
The shallowest drawer’s sprinters accessible are 12 crawls long. On the off chance that your shelving unit is lower than that depth, utilize a responding adage to remove the center area of every sprinter, holding the back and the front of them.
Step 5
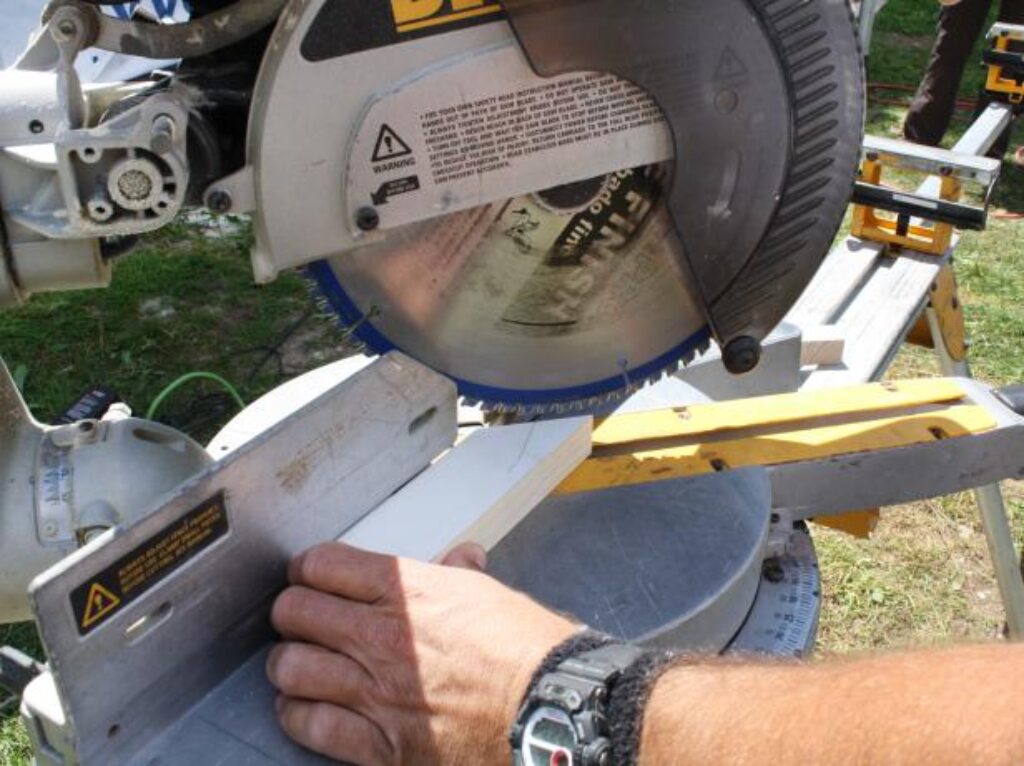
Utilizing a slash saw, slice a 1×8 board to the width of your shelving unit to make a rack base for every bushel.